How I Got Started

I started Butterfly gardening many years ago. My yard has been a progression over the years, and has made many transformations. Twenty years ago I experienced Hurricane Andrew. My yard and house were destroyed. We decided not to replace the pool screening and open up the backyard and put in some landscaping. That was the official beginning of my love for gardening in South Florida. I added a beautiful water garden years ago, and have been adding host and larvae plants for pollinators, mostly for the butterfly, for as many years as I can remember. I had my yard certified as a Natural Habitat, through the National Wildlife Foundation. To have a natural habitat you need to provide and meet certain requirements: 1. Provide a food source, 2. Provide a water source, 3. Cover, 4. A place to raise young. I try not to use any pesticides in my yard. I vermicompost and recycle as many of my food scraps as possible. If I had more land I would have a huge compost bin to recycle all my yard cuttings. Basically, I try to lessen my carbon footprint on this earth. In my own little world or backyard I try to provide an ecosystem in my water garden, provide birdbaths, birdfeeders, hummingbird nectar sources, feeders, puddling areas, host plants and nectar plants for butterflies and other pollinators. I am hoping to raise everyone’s awareness of the importance of saving our Butterflies, Blooms & Bees. Without them our world and food source will be in trouble. I hope you all enjoy my journey. I am not a Master Gardener, or Master Beekeeper, an Entomologist, or Journalists. I am simply a Backyard Gardener who is trying to lessen her Carbon Footprint of this Earth.

I hope you enjoy my blogs.

Friday, June 8, 2012

Granola Recipe

On my recent trip to Boston my daughter Katie, who is much more disciplined than I, made some very delicious granola to munch on in the car. I would have been eating ‘Good n Plenty’s” or” Twizzlers.” My daughter has been following the Paleo Diet for some time and is very much into Cross Fit. She has been known to put herself through 21 day sugar detox. As much as I joke I have been, and can be very disciplined also, so I think I know where she gets her drive. I am just taking a hiatus from exercise in my life right now. I liked the granola so much I decided to make some. It turned out delicious. I combined two recipes that she sent me, and instead of using maple syrup I used my fresh honey from my hives. Here are the recipes and some pictures.

Nut Free Granola
  • ½ cup raw pumpkin seeds
  • ¾ cup raw sunflower seeds
  • ¼ cup raisins
  • ¼ cup dried cherries
  • ¼ cup unsweetened coconut flakes
  • ¼ cup fresh honey
  • 1 tsp vanilla extract
  • ½ tsp almond extract

Mix everything in a bowl, coating everything well with the honey. Spread evenly on a parchment lined baking sheet. Bake at 350 for 12-15 minutes, or until coconut is golden. Remove from oven and let cool on wire rack. If you choose, now is the time to add dark chocolate chips. When completely cooled, mixture will be crunchy and delicious!

Paleo Granola
  • 2 cups of sliced almonds
  • 2 cups of unsweetened coconut flakes
  • 1 cup raw sunflower seeds
  • 1 cup raw pepitas (shelled pumpkin seeds)
  • ¼ cup of honey
  • 1/3 cup extra virgin coconut oil
  • 2 tsp vanilla extract
  • 1 tsp ground cinnamon
  • 1 tsp ground nutmeg

Preheat oven to 350 degrees. Mix nuts and seeds together in a big bowl. Melt coconut oil and honey on low heat on the stovetop or in the microwave. Add vanilla. Pour coconut oil mixture over nuts and seeds. Stir to coat. Pour out onto prepared baking sheet and spread out evenly. Bake for 30 minutes, until golden brown. Let cool completely in pan, then pour into a plastic container or bag for storage.

This granola was delicious in fresh yogurt with raspberries and some fresh honey drizzled over top.

Enjoy!

Tuesday, June 5, 2012

Facts about Honey Bees

The next time you have the opportunity to eat some honey remember a few facts about how much work it has taken the honey bee to collect and make the honey. For example, it takes nearly 48 bees in their lifetime to actually make 2 tablespoons of honey. I still consider my honey to be liquid gold. I haven’t harvested enough to take it for granted. The few stings I have received from my girls just make it sweeter. Hope you enjoy these honey bee facts.
HONEY BEE FACTS

Sunday, June 3, 2012

Still monitoring my Splits

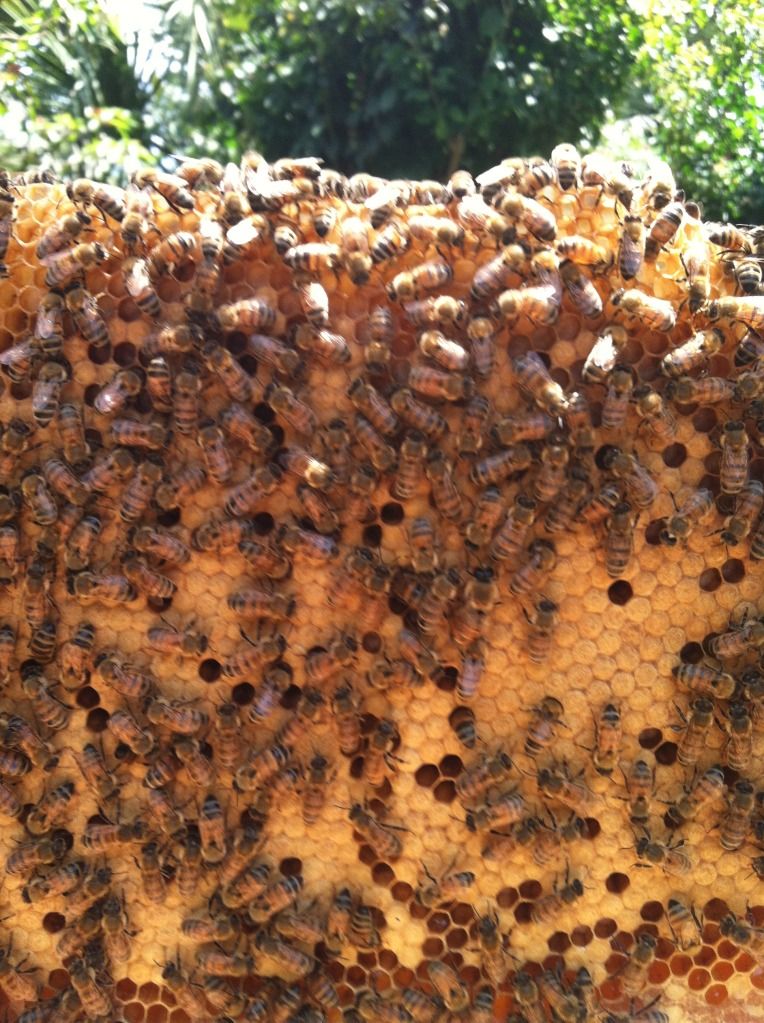
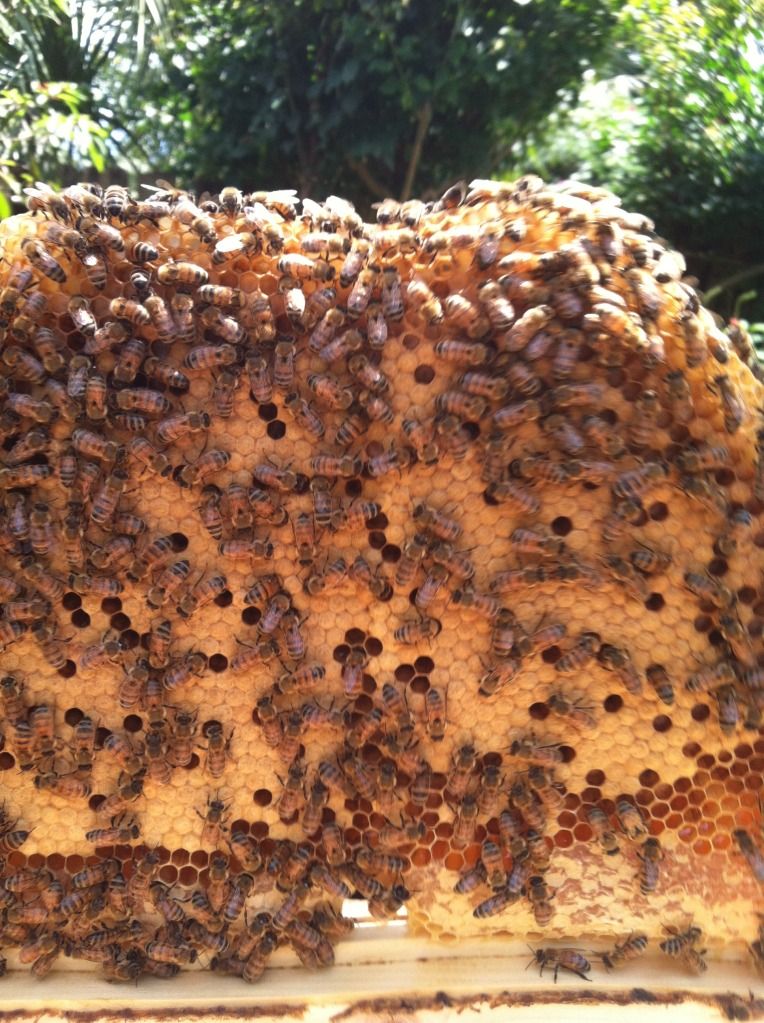
Today I went into the hives again to check on my splits. I believe that Hive #1 finally has a queen. I didn’t see the queen but I did see bars with various stages of brood. I have great difficulty with my eyes seeing the eggs. At first I saw one top bar that had mostly drone cells in the middle and thought maybe I had a laying worker. Then I actually saw a fairly good laying pattern of capped brood, open larvae and eggs. There were no queen cells present. The hive is up to 20 bars and the population looks much better. There are some bars towards the back that I should be able to harvest for honey in a few weeks. I did see a few small hive beetles when I first opened up the hive that scattered. Now that the population will be growing again hopefully the small hive beetles will remain under control.

I think Hive #2 has a queen. Again if I had better eyes I might be able to see the eggs better. I didn’t actually see the queen but I did see a fairly good laying pattern of capped brood and open larvae. I did see many bars with nectar and pollen. What I am trying to decide, is if what I am seeing is from the last queen that was present and suddenly disappeared, or is this new brood and larvae from the new queen. I think I saw some eggs, but I am not sure. I need to call my optometrist to see if she can fit me for a prescription that would help me see better in the hive. Progressive lenses and glasses are not good as I constantly have to adjust my eye position to see. I did add two bars of brood from hive #4 just in case they need eggs and brood to make a queen. I am not 100% sure this hive has a queen but all the queen cells that were present last inspection are gone. There are several bars towards the back of the hive that I should be able to harvest soon for honey!

Hives #3 and #4 are doing well. Hive #4 has a great queen. She is laying very well. Her abdomen is very elongated and she looks really good, and her laying pattern is very even. When I was in Albuquerque taking classes, one of the pearls I took away was the importance of rating the queen in each hive. Since I only have 4 hives it is not difficult to remember, but I have a book that I keep track of my hives and their progress each and every time I go into the hives. This book has been very important during these divides that I initiated this spring. I have been able to go back and read my notes and review what has been happening in the requeening process.

As I was working my hives today I was thinking about some of the things that Les Crowder talked about when he was teaching the classes. I found myself positioning the bars according to worker cells and drone cells. I moved all drone cells towards the back of the brood nest. I tried to keep the brood nest together. I moved darker comb and honey comb toward the back. I also moved bars with crooked or irregular comb towards the back so I could harvest them first. I took some bars that had double comb, and used the leaves from a plant to brush the bees off, and cut the comb off and repositioned it on an empty bar. I repositioned or reoriented bars with fat comb and made sure I position a straight comb in between. I came away from Albuquerque with many pearls of wisdom. Remembering them all and applying them will hopefully make me a better beekeeper. I am very grateful that I had the opportunity to attend the classes. I look forward to attending more classes in the future. I have heard many 30 year experienced beekeepers say they never stop learning as a beekeeper.

I am cautiously excited that maybe I have 4 hives that are finally Queen Right!!!

Visit My Website:
CLICK HERE

Or Visit My Etsy Shop:
CLICK HERE